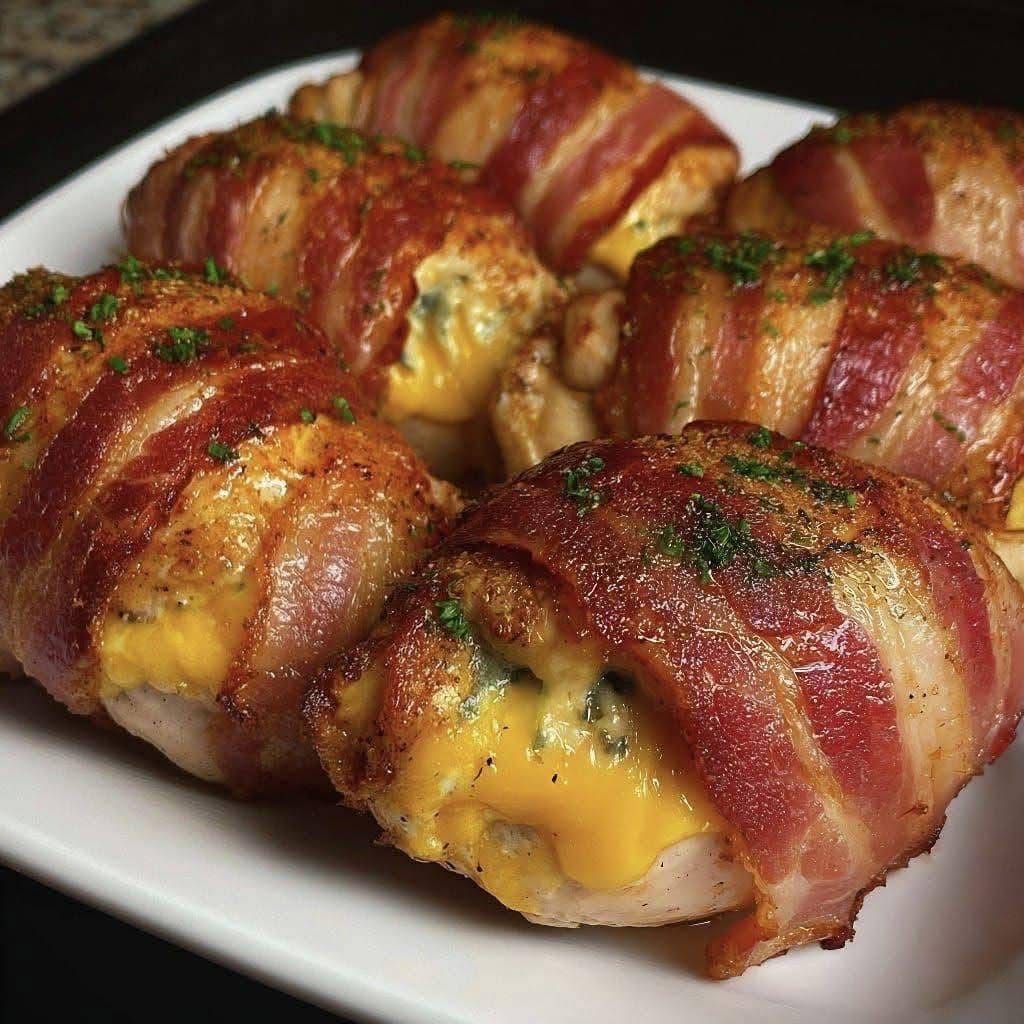
Of course! The classic Cheese-Stuffed Bacon-Wrapped Chicken is a crowd-pleaser for a reason. It looks impressive but is surprisingly straightforward.
Here is a detailed recipe and guide to help you make the most delicious, juicy, and flavorful version.
The Ultimate Cheese-Stuffed Bacon-Wrapped Chicken
This recipe yields a perfectly cooked chicken breast with a molten cheese center, wrapped in crispy, savory bacon.
Ingredients
· For the Chicken:
· 2 large boneless, skinless chicken breasts
· Salt and freshly ground black pepper
· 1 teaspoon garlic powder
· 1 teaspoon paprika (smoked paprika is excellent here)
· ½ teaspoon onion powder (optional)
· For the Filling:
· 4 slices of cheese, about 1×3 inches each (Cream cheese, mozzarella, provolone, or cheddar work well)
· Optional Fillings: 2 tbsp finely chopped spinach, 2 tbsp sun-dried tomatoes, 1-2 tbsp chopped jalapeños, or 2 tbsp cooked crumbled bacon.
· For the Wrapping:
· 8 slices of thin-cut bacon
· For the Glaze (Optional but Recommended):
· 2 tablespoons brown sugar
· 1 tablespoon maple syrup or honey
· ¼ teaspoon chili powder or a pinch of cayenne (for a sweet & spicy kick)
Instructions
Step 1: Prepare the Chicken
- Preheat your oven to 375°F (190°C). Line a baking sheet with aluminum foil and place a wire rack on top (this helps the bacon get crispy all around). If you don’t have a rack, you can bake directly on the foil, but you may need to flip halfway.
- Butterfly the Chicken: Place a chicken breast on a cutting board. Place your hand flat on top of it. Using a sharp knife, carefully slice horizontally through the middle, but do not cut all the way through. Open it up like a book. (See Pro-Tip #1 for an easier method).
- Pound the Chicken: Place the butterflied chicken between two pieces of plastic wrap or in a large zip-top bag. Using a rolling pin or meat mallet, gently pound it to an even ¼ to ½-inch thickness. This ensures even cooking and makes rolling easier.
- Season: Season both sides of the pounded chicken generously with salt, pepper, garlic powder, and paprika.
Step 2: Add the Filling and Roll
- Place two slices of your chosen cheese (and any optional fillings) in the center of each chicken breast.
- Carefully roll the chicken breast tightly around the cheese, starting from the smaller end, tucking in the sides as you go to fully enclose the filling. It should look like a burrito.
Step 3: Wrap with Bacon
- Lay 4 slices of bacon side-by-side on your cutting board, slightly overlapping.
- Place one rolled chicken breast at one end of the bacon strips.
- Carefully roll the bacon strips around the chicken, wrapping it snugly. The bacon’s own fat will help it stick to itself.
- Place the bacon-wrapped roll seam-side down on the prepared wire rack or baking sheet. Repeat with the second chicken breast.
Step 4: Apply the Glaze and Bake
- If using the glaze, mix the brown sugar, maple syrup, and chili powder in a small bowl. Brush half of the glaze generously over the top and sides of both bacon-wrapped chicken rolls.
- Bake for 25-35 minutes.
- Remove from the oven and carefully brush with the remaining glaze.
- Return to the oven and bake for another 10-15 minutes, or until the bacon is crispy and the internal temperature of the chicken (not the cheese) reaches 165°F (74°C) on an instant-read thermometer.
Step 5: Rest and Serve
- CRUCIAL STEP: Let the chicken rest for 5-10 minutes before slicing. This allows the juices to redistribute and prevents the cheese from immediately oozing out.
- Slice carefully with a sharp knife and serve immediately.
Critical Pro-Tips for Success
· Tip #1: The Pocket Method (Easier!) Instead of butterflying and pounding, you can simply cut a deep pocket into the side of the chicken breast. Be careful not to cut through the other three sides. Stuff the cheese into the pocket and secure with toothpicks before wrapping in bacon.
· Tip #2: Secure the Roll. If your chicken isn’t staying rolled, use 2-3 toothpicks to secure it before you wrap the bacon. Remember to remove them before serving!
· Tip #3: Don’t Skip the Wire Rack. Baking on a wire rack allows hot air to circulate around the entire roll, resulting in evenly cooked, crispy bacon instead of a soggy bottom.
· Tip #4: Check the Temperature. Bacon can look done before the chicken is fully cooked. The only way to be sure is with a meat thermometer. Aim for 165°F in the thickest part of the chicken.
· Tip #5: Broil for Crispiness. If the bacon isn’t as crispy as you’d like after baking, turn your oven to broil for the last 1-2 minutes. Watch it like a hawk to prevent burning!
Flavor Variations
· Cordon Bleu Style: Stuff with a slice of Swiss cheese and a slice of deli ham.
· Jalapeño Popper: Use a cream cheese filling mixed with chopped jalapeños and cheddar cheese.
· Italian Style: Stuff with mozzarella and sun-dried tomatoes, and mix dried Italian herbs (oregano, basil) into the seasoning.
Enjoy your incredible, restaurant-quality meal