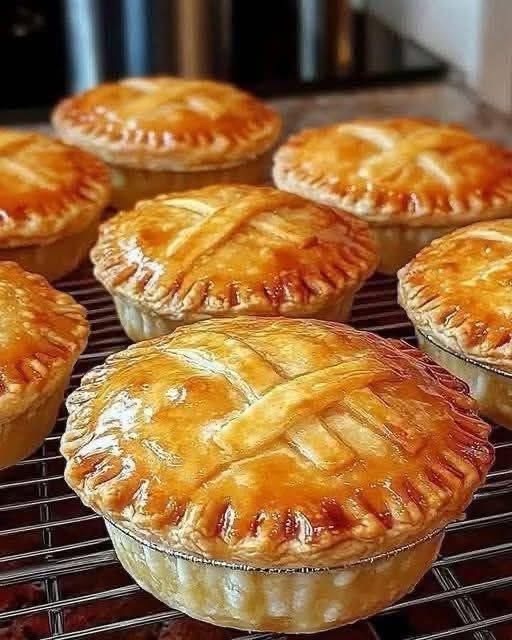
Of course! Mini Chicken Pot Pie Muffins are a brilliant, fun, and incredibly easy twist on the classic comfort food. They’re perfect for a quick weeknight dinner, party appetizers, or a kid-friendly lunch.
This recipe uses refrigerated biscuit dough for a super simple shortcut to a flaky, golden crust.
Mini Chicken Pot Pie Muffins
Yields: 12 mini pot pies
Prep time: 15 minutes
Cook time: 15-20 minutes
Ingredients
For the Filling:
· 2 tablespoons butter
· 1/3 cup finely diced onion
· 1/3 cup finely diced celery
· 1/3 cup finely diced carrots
· 2 cloves garlic, minced
· 1/4 cup all-purpose flour
· 1 1/2 cups chicken broth
· 1/3 cup milk or half-and-half
· 2 cups cooked chicken, shredded or diced (rotisserie chicken is perfect!)
· 1/2 cup frozen peas, thawed
· 1 teaspoon dried thyme or poultry seasoning
· Salt and black pepper to taste
For the Crust:
· 1 can (16.3 oz) refrigerated flaky biscuit dough (8 biscuits)
· Optional: 1 egg beaten with 1 tablespoon water (for egg wash)
Instructions
Step 1: Make the Savory Filling
- Sauté Vegetables: In a large skillet, melt the butter over medium heat. Add the onion, celery, and carrots. Cook for 5-7 minutes, until softened. Add the garlic and cook for another minute until fragrant.
- Make the Roux: Sprinkle the flour over the vegetables and stir constantly for 1 minute to cook off the raw flour taste.
- Create the Sauce: Gradually whisk in the chicken broth and milk until the mixture is smooth. Bring to a simmer, stirring constantly, until the sauce thickens significantly (about 3-5 minutes).
- Combine: Remove from heat. Stir in the cooked chicken, frozen peas, dried thyme, and season generously with salt and pepper. Let the filling cool slightly while you prepare the muffin tin.
Step 2: Assemble the Muffins
- Preheat Oven: Preheat your oven to 375°F (190°C). Grease a standard 12-cup muffin tin very well with non-stick cooking spray or butter.
- Prepare the “Crust”: Separate the biscuit dough into 8 biscuits. Using your fingers or a rolling pin, flatten and stretch each biscuit into a roughly 5-inch circle. You may need to dust lightly with flour to prevent sticking.
- Line the Tin: Gently press each biscuit circle into a muffin cup, allowing the edges to come up the sides. The dough will be thin, but it will puff up as it bakes. (Note: You have 8 biscuits for 12 cups. You can either make 8 fuller pot pies or divide the dough more carefully to stretch across all 12 cups.)
- Fill ‘Em Up: Spoon the chicken pot pie filling into each biscuit-lined cup, filling them to the top. Don’t overfill, or it may bubble over.
Step 3: Bake to Golden Perfection
- Optional Egg Wash: For a shiny, golden-brown top, brush the exposed biscuit edges with the egg wash.
- Bake: Place the muffin tin in the preheated oven and bake for 14-18 minutes, or until the biscuit crust is deep golden brown and the filling is bubbly.
- Cool: Let the pot pie muffins cool in the tin for 5 minutes before removing. This allows the filling to set slightly, making them easier to remove. Run a small knife around the edges to help loosen them.
Tips for Success & Flavor Variations
· Don’t Skip Greasing the Tin: This is crucial for easy removal!
· Avoid Soggy Bottoms: Letting the filling cool slightly before assembling helps prevent the biscuit dough from getting soggy before it has a chance to bake.
· Vegetable Variations: Feel free to add diced potatoes (par-boil them first), corn, or green beans.
· Cheesy Twist: Sprinkle a little shredded cheddar or Parmesan cheese into the filling or on top before baking.
· From-Scratch Dough: For a more traditional pot pie top, you can use a round of puff pastry instead of biscuit dough.
· Make-Ahead: You can prepare the filling up to 2 days in advance and store it in the refrigerator. Assemble and bake when ready to eat.
Enjoy these adorable, handheld pockets of comfort! They are guaranteed to be a hit.