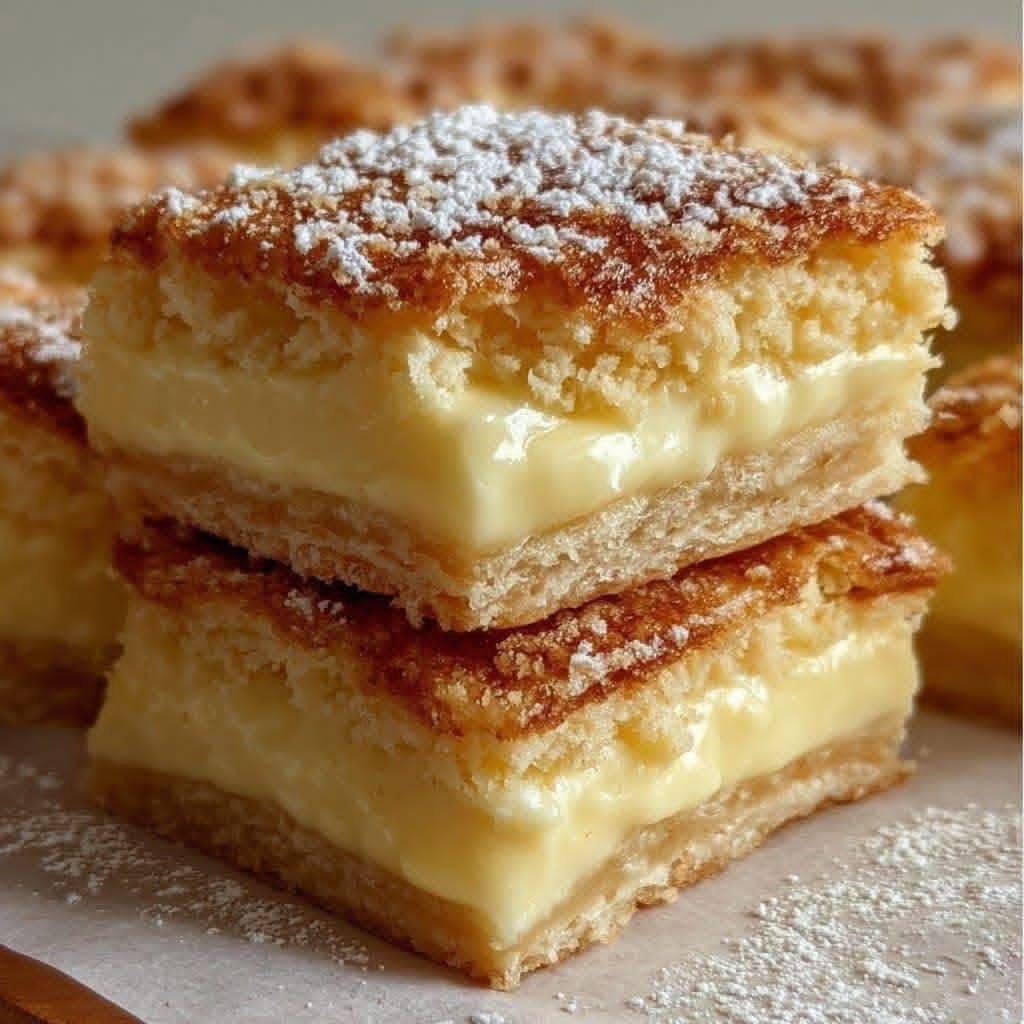
Ah, Vanilla Custard Cream Squares! This is a classic, beloved dessert known by many names around the world (like Napoleon, Kremówka, or Mille-feuille). It features flaky, buttery puff pastry layered with a rich, homemade vanilla custard.
This recipe is a labor of love, but the result is absolutely worth it.
Vanilla Custard Cream Squares
This recipe breaks down the process into manageable steps for a stunning, professional-looking dessert.
Yields: 9 large squares or 12 smaller rectangles
Prep time: 45 minutes (plus cooling and chilling)
Cook time: 30 minutes
Ingredients
For the Puff Pastry Layers:
· 1 package (approx. 17.3 oz or 2 sheets) frozen puff pastry, thawed according to package directions
For the Vanilla Custard (Pastry Cream):
· 2 cups (480ml) whole milk
· 1/2 cup (100g) granulated sugar
· 1/4 cup (30g) cornstarch
· 1/4 tsp salt
· 4 large egg yolks
· 2 tbsp (28g) unsalted butter, softened
· 2 tsp vanilla extract or vanilla bean paste
For the Optional Glaze:
· 1 cup (120g) powdered sugar
· 1-2 tbsp milk or cream
· 1/2 tsp vanilla extract
Instructions
Part 1: Baking the Puff Pastry
- Preheat and Prep: Preheat your oven to 400°F (200°C). Line two baking sheets with parchment paper.
- Prick and Bake: Unfold the thawed puff pastry sheets. Place each sheet on a prepared baking sheet. Using a fork, prick the pastry all over its surface. This is called “docking” and it prevents the pastry from puffing up too much.
- Press and Bake: Place a second sheet of parchment paper on top of each pastry sheet, then place another baking sheet on top. This weights the pastry down, ensuring it bakes flat and crisp.
- Bake for 18-22 minutes, or until the pastry is golden brown and crisp.
- Cool: Remove the top baking sheet and parchment paper and let the pastry sheets cool completely on a wire rack. They must be completely cool before assembling.
Part 2: Making the Vanilla Custard (Pastry Cream)
- Heat Milk: In a medium saucepan, heat the milk over medium heat until it just begins to steam; do not boil.
- Whisk Dry and Wet: In a separate, medium bowl, whisk together the sugar, cornstarch, and salt. Add the egg yolks and whisk vigorously until the mixture is thick, pale, and smooth.
- Temper the Eggs: While whisking constantly, slowly pour about half of the hot milk into the egg yolk mixture. This gradually raises the temperature of the eggs without scrambling them.
- Cook the Custard: Pour the entire egg-milk mixture back into the saucepan with the remaining milk. Cook over medium heat, whisking constantly, until the mixture thickens and comes to a low boil. Let it boil for 60 seconds; it should be very thick.
- Finish the Cream: Remove from heat. Whisk in the softened butter and vanilla extract until fully incorporated.
- Chill: Pour the custard into a clean bowl. Press a piece of plastic wrap directly onto the surface to prevent a skin from forming. Refrigerate for at least 2-3 hours, or until completely cold and set.
Part 3: Assembling the Squares
- Level the Pastry (Optional but Recommended): Once the pastry sheets are cool, use a serrated knife to carefully slice off any overly puffed areas to create two flat, even layers.
- Layer: Place one puff pastry sheet on a serving board or cutting board. Spread the entire chilled vanilla custard evenly over the top.
- Top it Off: Gently place the second puff pastry sheet on top of the custard, pressing down lightly.
Part 4: The Final Touches
- Make the Glaze (Optional): Whisk the powdered sugar, 1 tbsp of milk, and vanilla together until smooth. Add more milk, a teaspoon at a time, until it reaches a thick but pourable consistency.
- Glaze and Chill: Pour the glaze over the top pastry layer and spread it evenly to the edges. Allow the glaze to set for 10-15 minutes.
- The Most Important Step – Chill: Refrigerate the entire assembled dessert for at least 4 hours, or preferably overnight. This is non-negotiable! It allows the custard to firm up and the pastry to soften slightly, making it possible to slice cleanly.
- Slice and Serve: Use a long, sharp knife to trim the edges for a clean look (chef’s snack!), then cut into squares or rectangles. Wipe the knife clean between cuts for the neatest slices.
Pro Tips for Perfect Custard Squares
· Patience is Key: Do not skip the chilling steps. Assembling with warm pastry or custard will lead to a soupy, messy disaster. The long chill is what gives you perfect, neat layers.
· Prevent a Skin: Pressing plastic wrap directly on the custard surface is the best way to prevent a rubbery skin from forming.
· Cornstarch is Your Friend: This recipe uses cornstarch to stabilize the custard, making it sturdy enough to hold the layers. A flour-based custard can be softer and weep more easily.
· Flavor Variations:
· Lemon: Add the zest of one lemon to the milk as it heats.
· Chocolate: Whisk 1/4 cup of cocoa powder into the sugar/cornstarch mixture.
· Coffee: Dissolve 1 tbsp of instant espresso powder into the hot milk.
· For a Professional Look: After glazing, you can create a classic pattern by dragging a fork or toothpick through the glaze before it sets.
Enjoy this timeless, decadent treat! It’s perfect for parties, potlucks, or a special weekend dessert.