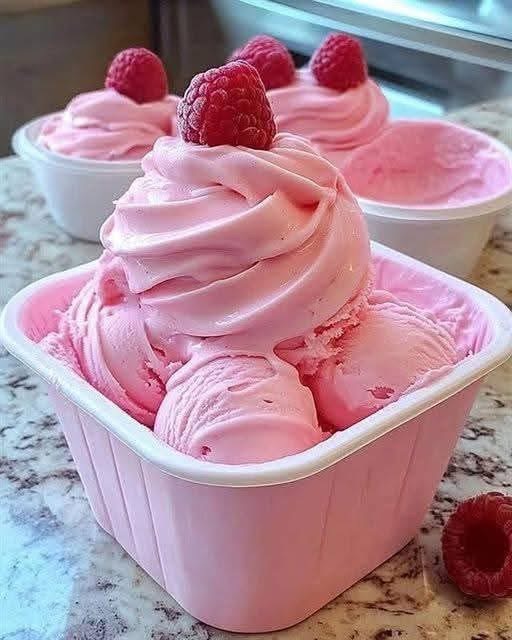
Of course! Homemade Raspberry Ice Cream is a true delight, bursting with fresh, tangy flavor. Here are two fantastic recipes: a classic custard base for a rich, creamy result and an egg-free (Philadelphia-style) version for a brighter, fruit-forward taste.
Recipe 1: Classic & Creamy Raspberry Ice Cream (Custard Base)
This version uses egg yolks to create a luxuriously rich and smooth base that balances the tartness of the raspberries perfectly. It’s incredibly decadent.
Yields: About 1 quart
Prep time: 25 minutes + Chilling + Freezing
Special equipment: Ice Cream Maker, Fine-Mesh Sieve
Ingredients:
· 2 cups fresh raspberries (or frozen, thawed)
· ¾ cup granulated sugar, divided
· 1 tbsp lemon juice
· 1 ½ cups heavy cream (35%)
· 1 cup whole milk
· 4 large egg yolks
· Pinch of salt
Instructions:
- Make the Raspberry Purée:
· In a saucepan, combine the raspberries, ¼ cup of the sugar, and the lemon juice.
· Cook over medium heat for 5-8 minutes, stirring often, until the berries break down and become saucy.
· Press the mixture through a fine-mesh sieve into a bowl to remove the seeds. Discard the seeds. Let the puree cool. - Prepare the Custard Base:
· In a separate medium saucepan, heat the cream, milk, and salt over medium heat until it just begins to steam (small bubbles will form around the edges). Do not boil.
· In a separate bowl, whisk the egg yolks and the remaining ½ cup of sugar together until pale and slightly thickened. - Temper the Eggs:
· Slowly pour about ½ cup of the hot cream mixture into the egg yolks while whisking constantly. This prevents the eggs from scrambling.
· Gradually whisk the egg mixture back into the saucepan with the remaining hot cream. - Cook the Custard:
· Cook over low heat, stirring constantly with a spatula or wooden spoon, until the mixture thickens enough to coat the back of the spoon (around 170-175°F / 76-80°C). This should take 5-10 minutes. Do not let it boil. - Chill the Base:
· Immediately strain the custard through a fine-mesh sieve into a clean bowl to catch any bits of cooked egg.
· Stir the raspberry purée into the custard.
· Cover the bowl with plastic wrap, pressing it directly onto the surface of the custard to prevent a skin from forming.
· Refrigerate for at least 4 hours, or preferably overnight, until completely cold. - Churn the Ice Cream:
· Pour the chilled base into your ice cream maker and churn according to the manufacturer’s instructions (usually 20-30 minutes). It will have a soft-serve consistency. - Freeze to Firm Up:
· Transfer the churned ice cream to an airtight container. For the best texture, press a piece of parchment paper directly onto the surface before sealing the lid.
· Freeze for at least 4-6 hours, or until firm.
Recipe 2: Easy & Bright Raspberry Ice Cream (No-Cook, No-Eggs)
This is a quicker, lighter option that lets the fresh flavor of the raspberries shine. It’s tangy, refreshing, and perfect for a hot day.
Yields: About 1 quart
Prep time: 15 minutes + Chilling + Freezing
Special equipment: Blender, Ice Cream Maker
Ingredients:
· 3 cups fresh raspberries (or frozen, thawed)
· 1 cup granulated sugar
· 2 cups heavy cream (35%), very cold
· 1 cup whole milk, very cold
· 1 tbsp lemon juice
· 1 tsp vanilla extract (optional)
· Pinch of salt
Instructions:
- Macerate the Berries:
· In a bowl, mash the raspberries with the sugar and lemon juice. Let them sit for 15-20 minutes until the sugar dissolves and the berries release their juice. - Create the Base:
· Pour the raspberry mixture (and all the juices) into a blender. Add the cold milk, cold cream, vanilla extract (if using), and salt.
· Blend until smooth. - Strain (Optional but Recommended):
· For a perfectly smooth ice cream, strain the mixture through a fine-mesh sieve to remove the raspberry seeds. This step is optional, but it creates a much more pleasant texture. - Chill and Churn:
· Cover the base and refrigerate for at least 1-2 hours until very cold.
· Churn in your ice cream maker according to the manufacturer’s instructions. - Freeze:
· Transfer to an airtight container, press parchment paper on the surface, and freeze until firm.
Success Tips for Both Recipes:
· Don’t Skip the Sieve: Straining the raspberry purée is the key to a seed-free, silky-smooth ice cream.
· Chill Everything: A cold base churns faster and results in a creamier final product with less ice crystal formation.
· Ripple Effect: For a raspberry ripple, reserve about ½ cup of the seedless purée. After churning, layer the ice cream with dollops of the puree in the container before freezing. Do not over-mix.
· Using Frozen Berries: Frozen berries work perfectly! Just thaw them completely before using, and use all the juices that are released.
· No Ice Cream Maker? You can make a “no-churn” version. For the egg-free recipe, whip the 2 cups of heavy cream to soft peaks, then gently fold it into the strained raspberry-milk mixture. Freeze. The texture will be less creamy but still delicious.
Enjoy your homemade summer treat